Saturday, June 9, 2012

Birthday gift card box.

Yesterday afternoon I was on a roll. Not only did I make the Monster Card, but I also had a go at making a box. I used the Top note die box idea that I'd seen flying around the net and teamed it with a little box to stick in between. Instead of using it as a gift box, I decided that I would use it as a gift card box. So made 8 little birthday gift cards that matched the outside of the box. 

I think it's soo cute, and would make a wonderful birthday present for a little girl. I am working on a boys version today. So come back and check out what I come up with. 


Friday, June 8, 2012

Make a Monster - Happy Birthday Card.


This afternoon I finally got around to making a card. I spent most of Thursday/Friday rearranging furniture in my house so that I was able to craft in my loungeroom again, I just find it so much more comfortable. And so now that it's all finished, I was able to create. 


This is the card that I came up with. Using Peach Parfait, Concord Crush and Pear Pizzazz card stock and inks, and the Make a monster and Bring on the cake stamp sets. 


I won't say it's one of my favourite cards, but I am happy enough to send it out to someone. :D 


I am back.


yes you read that right. 


For those of you who I don't have on my Facebook or who haven't heard. My beautiful little boy James, passed away last year of Cancer, in October, and that is why I haven't been posting/crafting for a while. My head and my heart just haven't been in it, but I would really like to try and get back into something, and try and push through these deep dark days.


I am going to try and post at least once a week. A couple of my close friends have been on my back about getting my blog off the ground again, and so here I am. It may not always be cards that I post, but I'm sure I'll find something "Crafty" to post about!! Hope you all enjoy my future posts. 

Sunday, September 25, 2011

Monster Birthday Card

Following on from my last post..

James had his birthday in Melbourne and he had been eyeing this stamp set off for a while in the Catalogue, so while I had some spare $$ I bought it knowing that it would make his day seeing a birthday card for him with these images on them.

He aboslutely LOVED his birthday card, and said it was the best one that he received. Gotta love 6 year olds.

I made the card using the colours of his Favourite Football Team (Adelaide Crows - Red, Blue, Yellow) and threw in some purple just to finish it off.

Thursday, September 22, 2011

Owl Thank you Cards

While I was in Melbourne for my Son's surgery I had plenty of time to sit and craft.

Because he was having a small Birthday Party on one of the weekends with some people that we had never met (All from a parenting website whom I have known for about 7 years) I felt the need to make up little Thank you Cards to put inside the kids party boxes.

This is what I came up with, again I've used the Owl, I LOVE this little stamp set.


Sorry they're not very clear... I only had my mobile on me that day and that was the best I could get. I did blue for the boys, and pink for the girls. They all loved them, and James had a WONDERFUL birthday party with some lovely new friends.

Wednesday, September 7, 2011

Card Organizer Revisited.

Today I had a day where I could just sit and play all day. I decided to make today a day of finishing off projects that I'd started but never finished. Well this Card Organizer was one of those things.

Do you remember this post back in Jan of this year, I made it up for a friend. Well I really wanted one for myself as well, and started making it, and then of course life got too hectic for me to spend any real time in here finishing it off. So TODAY was that day. I'm quite pleased with the way it's turned out.

Tuesday, September 6, 2011

10 years today...

I know it's not a crafty entry but I just wanted to wish my darling Husband

A HAPPY 10 YEAR ANNIVERSARY!!!!!

I can't believe that we have been together for 10 years today.. Where have those years gone. We've had a LOT of up's and down's as most couples do, but no matter what we have stuck by each other to get to where we are today.. I know this past year has been HELL on both of us with what we have been through with James, but we WILL come out on top and make at least another 10 years..

I LOVE YOU!!!! HAPPY ANNIVERSARY.


Thursday, September 1, 2011

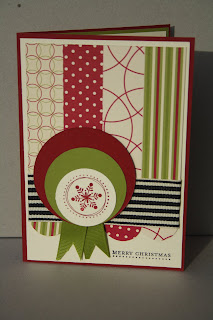
Non traditional Christmas Card

New Stampin' Up 2011-2012 Catalogue goes live today!! Whooo hooo!! There is soo much in there that I want to get my hot little hands on...

So with the new Catalogue due out, I decided to sit down and try my hand at a Christmas Card with Non traditonal colours. Not just for something different, but because we have a few friends who don't celebrate Christmas.

So this card is one that I can send, without it having to have Christmas sayings on it.

It also uses the new Just eat Cake DSP from the brand new Stampin Up! Catalogue, and the new Tags till Christmas Stamp set.

Wednesday, August 31, 2011

Thank You Card

This card was made after we got home from Melbourne.

I wanted to make a little something to say "THANK YOU" to James's teacher for the letters and presents that she continually sent to James while he was in hospital. I really wanted to let her know that we really did appreciate what she was doing.

Again I used the owl stamps, I think they are just gorgeous, and used the Celebrations DSP, which kind of gave off the desired "Schooling effect" that I was after. A bit of twine, the tag punch and a thank you stamp finished it off nicely for me.

And I can safely say that his teacher liked it. She thought it was wonderful.


Sunday, August 28, 2011

Sew Suite.

This card was just a play around with the Sew Suit set. I do realise that most of these sets are now retired or retiring, but I just hadn't gotten around to showing any of them.

I've used the sweet stitches dsp as well as tangerine tango, daffodil delight and pumpkin pie card.


Saturday, August 27, 2011

Father's Card.

I did managed to get something OTHER than birthday and thank you cards done. I did a few of these "Dear Father" cards.

I'm still deciding if I should give it to my other half for Father's Day this year, or wait for his Birthday. We shall see. I made about 4 of these in an afternoon, and donated 2 to the Ronald McDonald House (as well as a few others that I'd made) for them to sell and keep the proceeds.

Before I'd even got to donating them, one of the girls on the desk had a look and bought 4. She absolutely LOVED them and wanted them for herself. I felt quite proud after hearing that.

This card used the Sail Away a-la-carte and the well scripted stamp sets. The jumbo eyelets were a last minute inclusion, that I think sets that card.


Friday, August 26, 2011

Island Oasis Happy Birthday.

Don't you just love the colours of this card..

This card was made using the Island Oasis DSP, Whisper white, and Rose Red.. I layered the Whisper white and Rose Red and on one of the layers used the big shot and polka dot embossing folder and embossed. I've also used scallop circle punch to punch out my shapes and stuck them together with a brad.

Thursday, August 25, 2011

A VERY special gift..

Last Thursday I took my hubby and both my boys to the Botanical Gardens in Adelaide for a family photo shoot. The only difference to this one compared to others, was that we had a professional photographer do the photos for us.

With my youngest having Cancer we were directed towards a web page called Heartfelt. Heartfelt is a organization who with the help of some WONDERFUL photographers Australia wide, offer free photo sessions for Families who are suffering from the loss of a child, or whose children have terminal or serious illnesses. Once we found out that we were eligible we arranged with a photographer from Wild Lilly Studios. Carol is an absolutely AMAZING photographer and I'm in love with all her work, not to mention she is a wonderfully friendly and bubbly person. I really can't wait to see our photos when we get them sent to us.

Anyway, as my way of saying THANK YOU to her for her time and effort I made her a little gift. I found the most gorgeous little Stationery Box set Here. So set about making it. I'm pleased to say that after dropping it off to her yesterday she LOVED IT!! I'm sure I saw a tear or two come to her eyes, although I could be mistaken. I also just want to say if you're reading this Carol - that I'm so glad your little girl isn't as sick as first thought.

Box from outside.

Close up of scallop circle with pearls on front of box.

The inside of the box.

Gift cards with matching envelopes

Gift tags

Normal sized card plus also had matching envelopes.

The 2nd design of the normal cards again with matching envelopes. 

Wednesday, August 24, 2011

Strength and Hope Stamp Set

Another birthday card - this time for one of the girls in the Ronald McDonald house that I became quite friendly with. Her daughter was turning 9 while we were there and she loves butterfly's. I knew this stamp set would be perfect for her.

This card uses the Strength and hope set that was in the mini catalogue raising fund for Breast Cancer research. I'm thinking of making another one but in pink's. I think it would look lovely.

Tuesday, August 23, 2011

Left over Card design #3

Here it is.. The last of 3 cards in the competition that I was in .

I didn't win, but had fun making them up anyway, and the best bit was, we got to keep them after judging had been finished.

Monday, August 22, 2011

Left over Card design #2

Here is the 2nd card that I designed using the kits I was sent.

We were able to add extra's to the cards if we liked, but weren't allowed to remove anything. Everything that was in the kit had to be used in some way or another..

With this one, I added the chipboard letters and re-inked them in Chocolate chip and So Saffron to made the DAD


Sunday, August 21, 2011

Left over Card design

Back at the end of July I took part in my uplines "left over Card kit" competition.

Those of us who entered were sent out 1 or in my case 4 of her left over card kits (from different classes that she's had over the last 12 or so months) and we had to design a card based on what was in that package. I have 3 to show but as I did with the wedding cards last month will show them 1 at a time.

This is what I came up with.
Card #1

Saturday, August 20, 2011

Mojo Monday


This card I'm extremely proud of. So proud in fact that I even submitted it for the Mojo Monday competition.

Usually I would just play along and then hide my card away never to be seen by anyone other than myself and whom ever I might pass it along to.

This card however was completely different. I just fell in love with the way it was coming along, and I think the Jolly holiday DSP and Cherry Cobbler and Old Olive card stock just set it off. Hope you enojy it as much as I do.


Friday, August 19, 2011

And so it starts..

... the annual Christmas Card stack..

Every year I make all my Christmas Cards, and this year is no different.

This design came from the Mojo Monday Challenge it's a little old, but I was just sifting through them and came across it. It also uses the soon to be retired Jolly Holiday DSP - which was one of my Favourites in the old catalogue. But all good things must come to an end.

Over the next few months there will be odd posts here and there with Christmas cards more than likely featuring this paper, Ive stocked up big during the end of catalogue sale.


Tuesday, August 16, 2011

Scallop Birthday Card

Here is the birthday Card that accompanied the Wedding cards.

It was a Mojo Monday card sketch. And old one granted, but I thought I'd give it a go.

I was asked to use Purples and Butterfly's on this card, but apart from that I had free reign of the design. I hope that the person it's for will like it as much as I do.


Saturday, August 13, 2011

Wedding Card #3

Here is the 3rd and Final Wedding Card.

I should note that the Stamp set was kindly lent to me by my Upline Nicole Derendorf.

I just love the simplicity of this card.. I stamped the flower as a background image with versamark, and then used Stazon ink for the big black bold image. I've also used some Black satin ribbon (again thanks to my upline) and the decorative label punch. As with all my cards, I've co-ordinated the inside of the card as well as the envelopes.

Wednesday, August 10, 2011

Wedding Card #2

This is the 2nd of 3 Wedding Cards that I said I'd show.

This one was made using Very Vanilla Card stock, the Manhattan Flower Embossing folder, Very Vanilla Ribbon, the decorative label punch and a piece of brushed silver card stock. 

I think it looks quite elegant for something so simple.


Sunday, August 7, 2011

Wedding Card

I have been commissioned to make 3 Wedding Cards and 1 Birthday card for an old school friend. I have 3 weeks to get them done, well yesterday I managed to have an afternoon at home in my Craft room. The first for a long time, and so managed to make up 3 of the 4 cards.. 

The first I'm showing today, and the rest I'll show over the next few days. This card uses the Fifth Avenue Floral and Curly Cute stamp sets, as well as Whisper White and Brushed Silver card stock, and Very Vanilla ribbon. I added a few pearls in there just to finish it off and make it more like a Wedding Card. 


Thursday, August 4, 2011

What a few months..

.. we have had in our household..

First of all sorry for not having posted in AGES!!! But I have been quite busy with my eldest son for the majority of this year. Back in Feb, he was diagnosed with Liver Cancer, and we have spent the past 6 months going back and forwards to Adelaide/Melbourne and our home town. Things are on the up now though, and he only has another 12 weeks of Chemo to go and then that *should* be the end of it..

On the upside to that I have had PLENTY of time to craft, especially over the 8 weeks that I was in Melbourne. I will slowly show each and every creation of mine that I've done, and will hopefully be able to get back to regular posts now that life is slowing down.

Tuesday, January 18, 2011

Mini Tool Box

How gorgeous is this little mini tool box. I found this one while searching the net one night, looking for a male type box to use for some chocolates and a gift voucher. I came across this site Kari Hughes, and saw the most gorgeous little box. Once I'd got the directions and printed it out, I set about making up the box. The most time consuming part of it is the cutting out of the box, once that's done, it's simple to put together, and is to die for.


What do you think???